
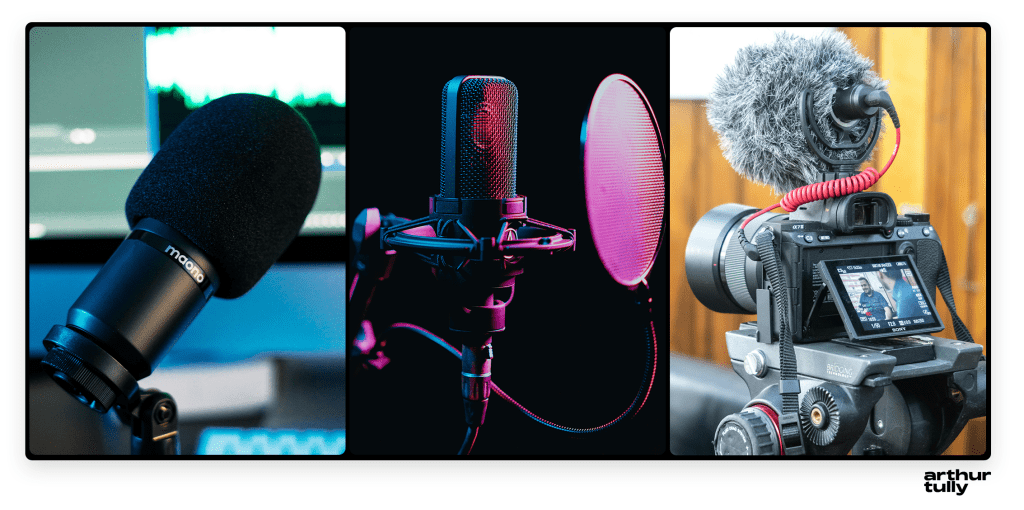
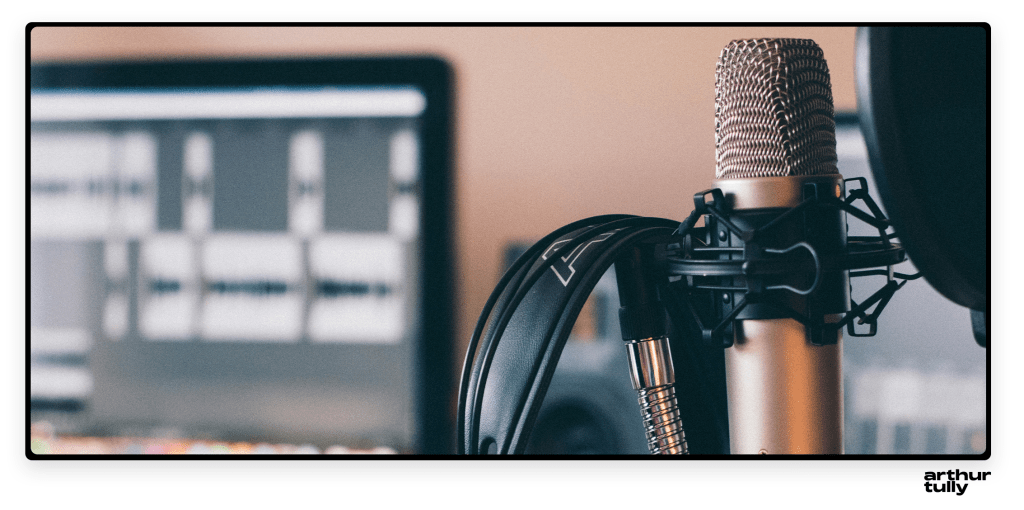
When it comes to voice recording, people often focus on gear and software used, like microphones, preamps, and interfaces. And while those components do affect sound, they’re only half the battle. If you neglect the fundamental skill of correct mic position and overall proper mic technique, all that fancy equipment won’t make a difference to the average listener.
The secret to great recordings starts with how you use your gear. It doesn’t matter if you have an affordable USB microphone like the Elgato Wave 3 or one of the best home studio microphones out there like the Shure SM7B how you use it is the difference between a great or terrible audio.
The principle behind using most microphones out there is about the same so once you master one you won’t ever struggle with any other microphone. You can obsess over gear only after getting the basics down.
The secret to amazing audio? It comes down to ‘mic technique’
Mic technique refers to the way you use your microphone. It’s not just about plugging in a mic and hoping for the best; it’s an art that requires some know-how and practice. Good mic technique can make your audio sound professional, clear, and engaging, while bad technique can make you sound like, well, a hot mess. It consists of mic level, proximity, voice level, and mic angle. This is also dependent on your audio equipment too.
If you have a good base for your audio, meaning good mic technique, then you can have great audio regardless of which microphone, audio interface or software you use. With good mic technique you can use a $15 microphone and with bad technique you’ll ruin the recording with a $2000 one.
Besides having good volume you can avoid some post or live processing like plosive “pops” or harsh sibilance. Ignoring it means you’ll have more processing applied or end up with bad audio.
Basically if you don’t have a good mic technique you won’t have a good podcast or livestream audio.
How to establish proper mic technique?
There are four aspects of proper mic technique, mic level, proximity, voice level and mic angle. We’ll explore how each of these elements solves common recording problems, how they work, and most importantly how to use them to create amazing recordings.
Mic Level
First thing to address is the microphone’s mic level. This is also known as “gain” and “input level”, they all mean the same thing: the amount of signal going in from the microphone. Usually you this is set on audio interface or mixer.
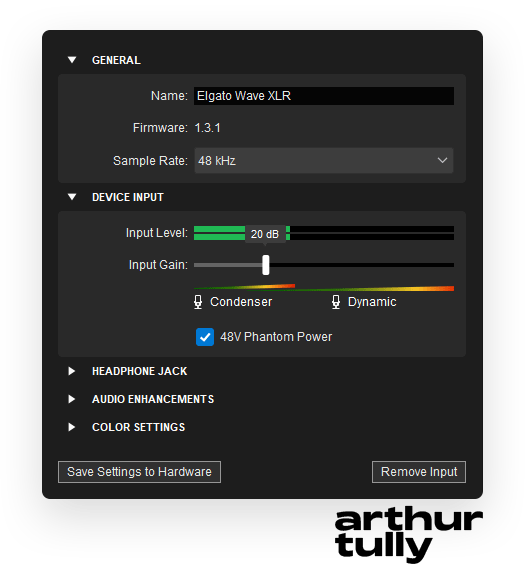
Keep in mind that this is not the same as the level output that you can find on some mixers, level is audio going out of the mixer. It’s important to highlight this because you can have gain maxed out and level at 10% and you will end up with a terrible recording basically distorting your audio while also being quiet. If your mixer has a level adjustment make sure to set it to ‘zero’ or ‘unity’ level before doing gain adjustments.
Another thing to keep in mind is the volume in windows. Usually for audio interfaces it will be set to 54 and if this is the case for you then you have lots of headroom for adjusting your audio. Keep the volume at 54 and simply increase the gain until it’s reaching proper levels. If your volume is at 100 you can go ahead and start adjusting the audio.
Speak into the microphone like you would during your recordings and increase or decrease the gain until you are at -10db. Easy way to get a precise measurement is to use OBS with ‘True Peak’ metering on. It’s fine if your peaks are a bit higher and generally I target -5db to -15db. This falls between the ‘broadcast audio range’ which gives you a few benefits:
- Your voice will captivate viewers or listeners attention: With your voice being at a proper volume your audience will pay more attention to the stream or podcast and engage more
- You will be understandable no matter the device they are using: People use different kinds of devices like old school speakers, monitor speakers, tvs, old headsets and at varied volumes. Having your voice in ‘broadcast audio range’ guarantees that they will be able to understand you even at 5% volume (just like the news on tv at low volume).
Correct mic position
This is determined by your microphones pick-up pattern and desired sound you’re trying to get. All microphones aren’t the same, there are cardioid, bidirectional, omnidirectional, super-cardioid just to name a few. Most common and the one you probably have is a cardioid microphone which picks up sound only from one side. This can be the side or the top of the microphone. An example of a really good side oriented cardioid mic is the Rode NT1 and a good example of top oriented cardioid mic is the Shure MV7X.
Second most commonly used mic in streaming or content creation is what’s called a ‘shotgun’ mic which refers to a super-cardioid pickup pattern (polar pattern). This means that the microphone will hyper focus on a narrow pickup angle and eliminate more noise. Besides that it can be up to 2 meters (6.5 feet) away from you making it ideal for professional settings. A good example of a super-cardioid is the SENNHEISER MKE600.
To get the proper volume from the microphone you want to be generally close to it. Good rule of thumb is four fingers width distance from the mic, this will allow the full range of your voice to come through at a good level. If you are closer the mic will be prone to capturing lots of mouth sounds making your audio almost ASMR-like and if you speak louder than you can distort the audio and peak. You also don’t want to be far away from the microphone (unless using a shotgun mic) because the microphone won’t be able to capture your voice fully at a good volume. This will have a negative side effect when using any active noise suppression on your microphone since it will struggle separating your voice from the noise because your voice will be at the same level as that noise. Make sure to check out my dive into different noise suppression algorithms.
Most microphones don’t come with a stand or mic arm. You should use a good mic arm or mic stand when setting up your microphone so you can get it into a proper position. For streaming or content creation I recommend the Elgato Wave Mic Arm, the Low Profile Variant, and the InnoGear Table Stand for table top setup (or any affordable $15 – $25 variant). If you need a full height mic stand I would go with the InnoGear Floor Mic Stand.
Voice level or voice projection
This refers to how loud you speak which in turn determines how loud will your voice be captured at. You don’t want to be projecting your voice constantly and use high gain settings because this will damage the microphone causing distortion at all levels afterwards. If you are going to be loud then back away from the microphone a bit to mitigate the loud sound coming in. When whispering you might want to get closer to the mic beyond the 4 finger distance to capture the full range of your voice at quieter volume.
Generally when setting up any microphone I try to have a client read something and then ask follow-up questions about that. This tells me what their speaking volume is and I can easily set it up. If the client is more experienced they will know if they project their voice while streaming and recording or if they put on a ‘youtuber’ voice. If that’s the case we usually adjust for that voice rather than the more relaxed voice during setups.
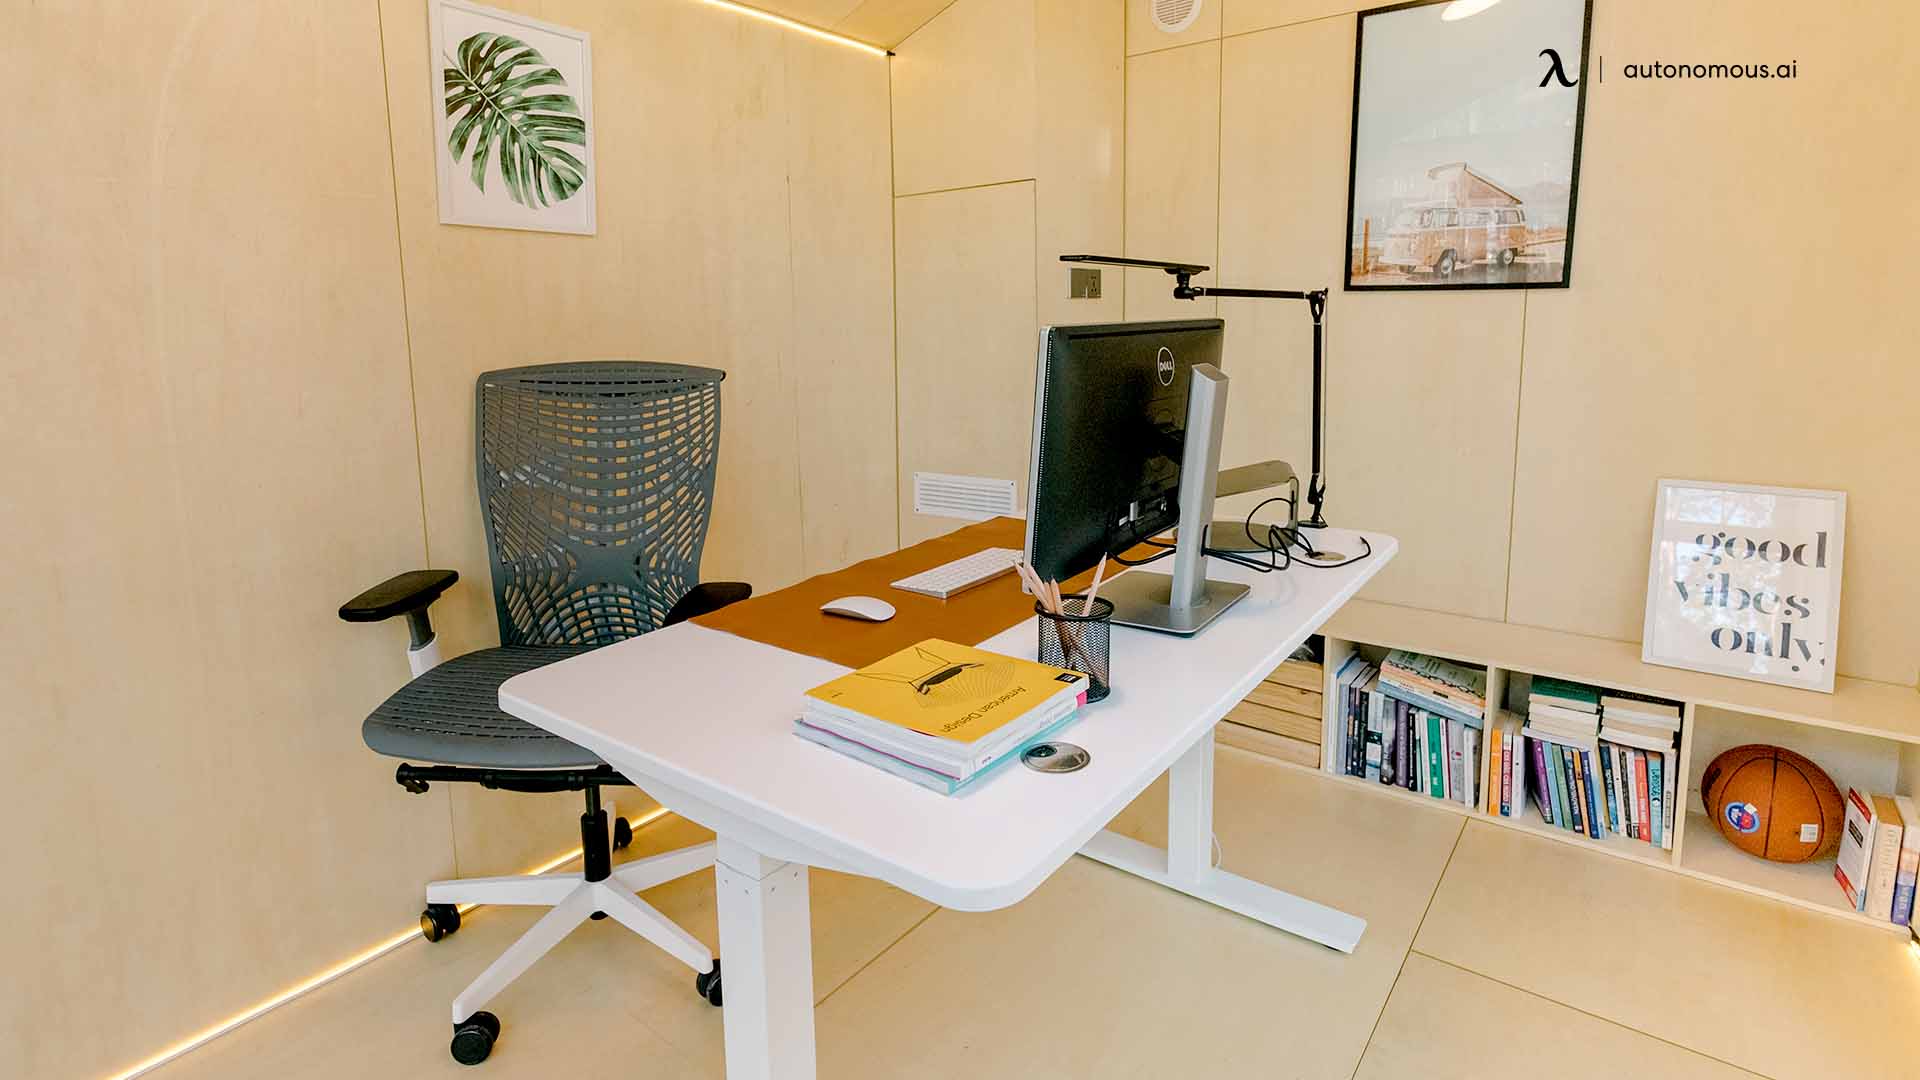
Voice level is important for background noise as well, if you don’t speak loud enough any active noise suppression will struggle separating your voice from the background and you’ll end up with lots of white noise causing inconsistency in the recording. If you’re in a room with lots of empty walls and no carpet your voice will reverb (reverb is a super short echo). To mitigate this you can speak at normal volume closer to the mic and it will reject more of the background noise. In situations like these you can position your desk facing the wall (photo courtesy of Autonomous AI) rather than the middle of the room and you will have a better chance of rejecting any reverb other than the one from the wall behind you. That small reverb from the wall behind you can be mitigated with wall sound panels like these (the best ones are super thick and super pointy). This position also allows you to position lights, camera and cable management much easier.
Correct mic angle
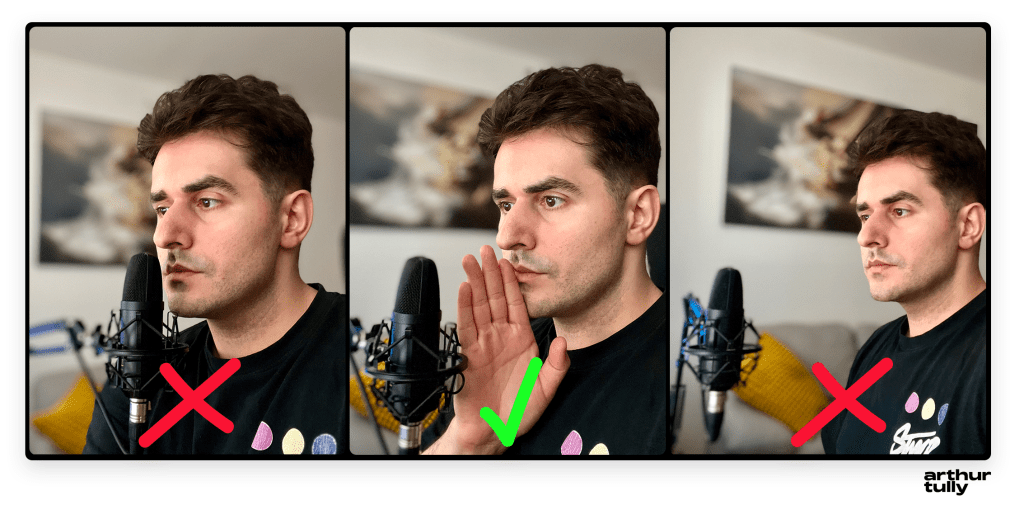
Setting up the correct mic angle can give you a different sound to the microphone or help get rid of problematic sounds. There are many ways to position the mic but generally you see it right in front of the speaker which is for the most part good especially if you’re on video. Depending on your mic through this can capture some unwanted sounds.
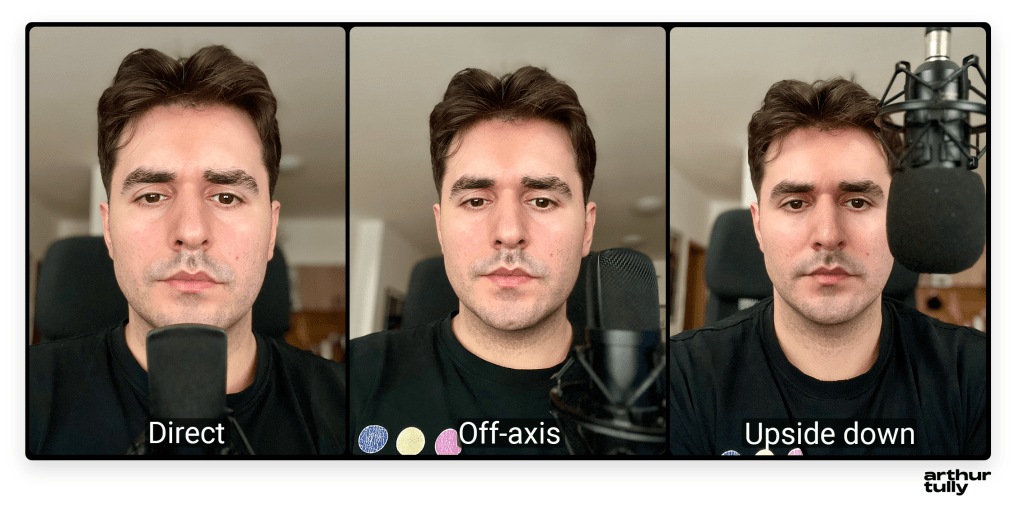
Mouth sounds, inhaling, plosives and sibilance can all be caused by direct mic angle or the microphone being right in front of you. To mitigate these sounds you can position the microphone slightly off-axis or to the side of your mouth. This way the mic will have a better chance of rejecting sounds inside your mouth like clicking for example. Sibilance or harsh fatiguing sounding ‘s’ or ‘z’ can also be mitigated using off-axis position. This also helps with plosive rejection or ‘p’ and ‘b’ sounds as well as any breathing sounds since you will be inhaling and exhaling past the microphone.
If you’re not on video positioning the microphone upside down slightly angled towards your mouth is ideal since this gives you the best chance to reduce all mentioned problems. This is how a lot of studio recordings are done.
Pop filters and windscreens
Pop filters are round mesh filters either plastic or metal used to redirect air from the mic or deal with plosives. They don’t particularly affect the sound, especially the metal ones. Windscreens or more known as ‘foam covers’ are used for the same purpose. They also come in two variants, regular foam and furry ones. The furry ones are useful for on the field recording.
Pop filters are better overall if you have the space for it because they produce a brighter sound compared to the muffled sound you get when using a windscreen. If you don’t have lots of space or if you’re on video I always recommend a windscreen since it’s far easier to work with and takes up less space.
You might want to consider a shock mount as well but I find that there’s no need for it since most newer microphones are designed to reject most of the handling noise (Shure SM7B) or they might come with a shock mount out of the box (Rode NT1).
Microphone choice
Above I’ve already mentioned a lot of microphones for pretty much anyone. People who are getting started streaming, youtube-ing or with voice acting. There are 2 most common microphone types: condenser and dynamic microphones.
Dynamic microphones offer less noise sensitivity and they are more rugged. They also handle higher sound levels which is why it’s the go-to microphone for a lot of streamers. They are usually more power hungry due to their construction but if paired with a good audio interface they will deliver an amazing sound. My recommendation for end-game setup currently is Elgato Wave XLR with the Shure SM7B. Wave is easily able to power that mic while keeping it in dynamic mode.
Condenser microphones are used for their sensitivity or affordability. One of the better options on the affordable end is the Elgato Wave 3, an excellent USB microphone. Condenser microphones are used in voice acting (or as Samantha Béart calls it: acting). They are preferred over dynamic mics due their sensitivity and precision. Neumann TLM 102 and Rode NT1 are excellent examples of voice over condenser microphones.
Make sure to choose the right microphone for your use case, if you don’t want the microphone on video get a shotgun one, if you have a bit of noise in the background get a dynamic one and if you’re doing voice over work get a condenser one.
Room treatment and acoustics
I’ve already mentioned reverb and a good way to deal with it by positioning your desk above but before commiting to a room I recommend considering the room acoustics. For example the kitchen has lots of flat surfaces and nothing really sound absorbing while the bedroom or walk in closet has lots of sound absorption. I’m not saying go in your closet and record but if you can avoid bigger rooms with lots of empty walls and flat surfaces that can bounce the sound causing reverb (short echo).
Carpets, bookshelves, painting prints, and blackout curtains can all absorb sound while adding to your room’s aesthetic. In a pinch you can cover yourself with a blanket to get that perfect take but if you’re at that level I recommend some sort of a booth. Either one you build or just panels in your closet.
If you’re streaming I’d use a dynamic microphone and eliminate reverb that way since the audience is much more tolerant to background noise.
Fake it ’till you make it
With this knowledge you should be more than ready to take on any recording challenge but as with everything it takes time to master it. Don’t be afraid to just start and figure things out on the way, that’s what most of us are doing and what most big streamers and podcasters did starting out.
My audio setup service covers mic technique, gain staging and so much more. If you’re still unsure and want some help considering hiring me.
Get started now
Disclosure: Some of the links on this website are affiliate links, which means that at no additional cost to you, I may earn a commission if you click through and make a purchase. I only recommend products and services that I believe will be helpful to you, and I appreciate your support in helping me to continue providing valuable content.